FileZilla server, Win SCP, Cyber duck there are lots of FTP clients available. Do you know which is the most powerful tool to speed up your file transfer from your local computer to your website?
We know this software or tool as an FTP. But do you know the full form, or what is the purpose of FTP? In this article, we will see what is FTP and how to use FTP.
What is FTP?
Firs, let us know the full form of FTP, File Transfer Protocol is the full name. FTP clients are used to uploading files or folders from your local computer to your online website or in other words web hosting account.
You can take it as your file management for the internet. The best thing about FTP clients is that you can access all the files even if the website is giving errors. But if your website has some critical issue, at that time you can’t use your admin login. So in this kind of case, you can use FTP clients.
Best FTP Software.
In the market, there are lots of FTP software available. You can use this popular software like Cyber duck for Mac, Win SCP for windows, and Filezilla server for cross-platform. FileZilla is the best software to use for working locally on your online web hosting account.
When you select your preferred FTP client then the very first stage is you have to download it and install it on your computer. FTP is used to connect your website to your hosting account and download/upload files using the FTP protocol.
How to use FTP?
So here we are going to use simple and basic concepts of the FileZilla server. You can also say that these steps are common steps for FTP clients.
Step 1: Download and install the FileZilla server.
You can download the FileZilla installer from the official website. Because, the other websites may have an infected setup. This kind of file may contain a virus and can harm your system.
Here is the URL of the official website for downloading FileZilla.
Step 2: Learn how FTP connect to server?
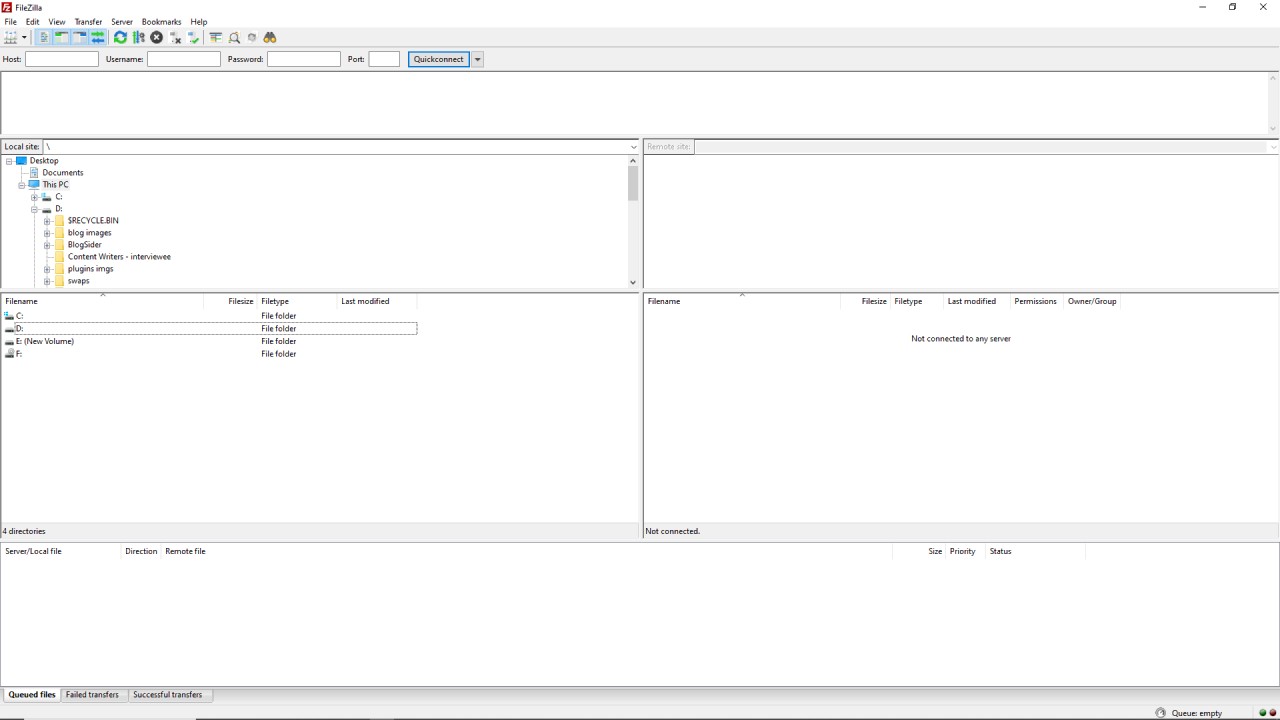
Once, you have done with the installation process. You just have to open it. And just head to the site manager. You can open a site manager in three different ways.
1st way is: Go to File menu > Site Manager.
2nd way is: You can directly click on the site manager menu from the toolbar.
3rd way: Use the shortcut which is CTRL + S.
After, opening the site manager you just have to perform the following steps to learn how to connect FTP to the website.
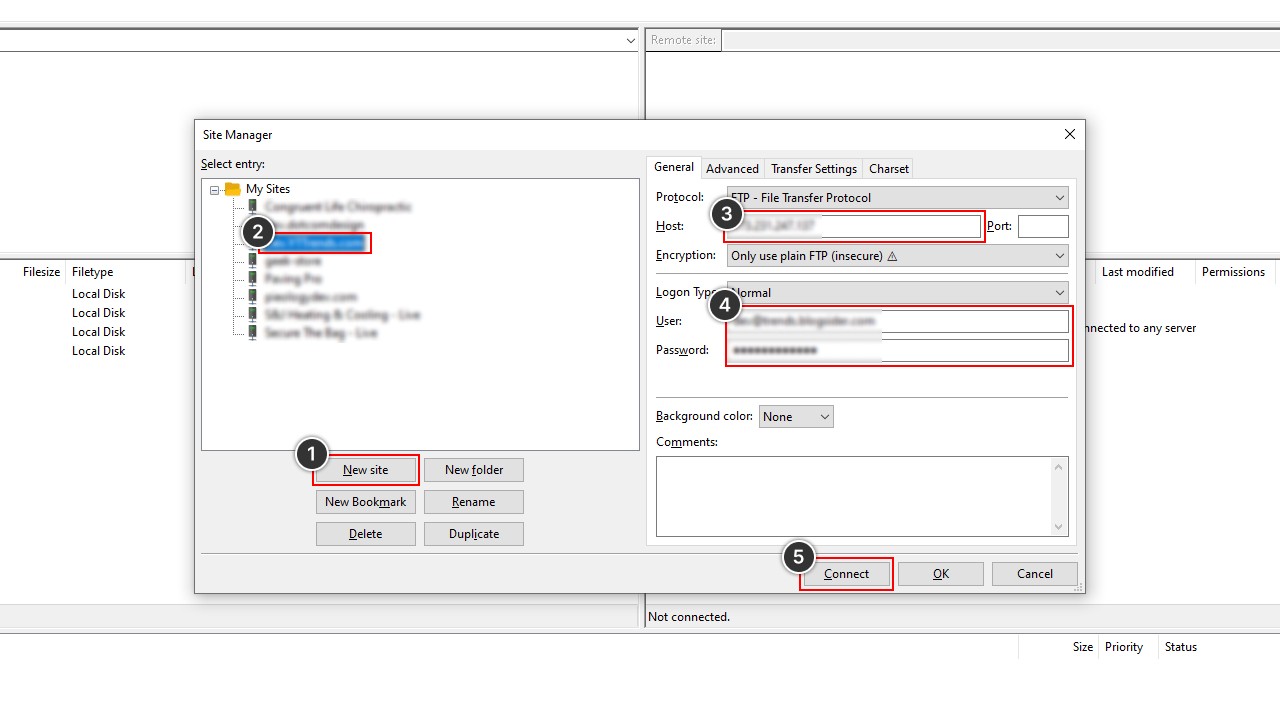
- By clicking on the “New Site” button at the bottom left panel of your window, you can add a new site setting in the site manager.
- Now add the name of your website to the left side panel of the window.
- Then add your hostname [http://www.website.com] or IP address [http://192.168.0.1] on the right side panel of the window. Below this selects the encryption method. “Only use plain FTP” this method is Speed up but also insecure.
- Choose “Normal” logon type, and now insert your user and password.
- Now click on the “Connect” Button. You can find this button at the bottom of the window.
Step 3: Download your files.
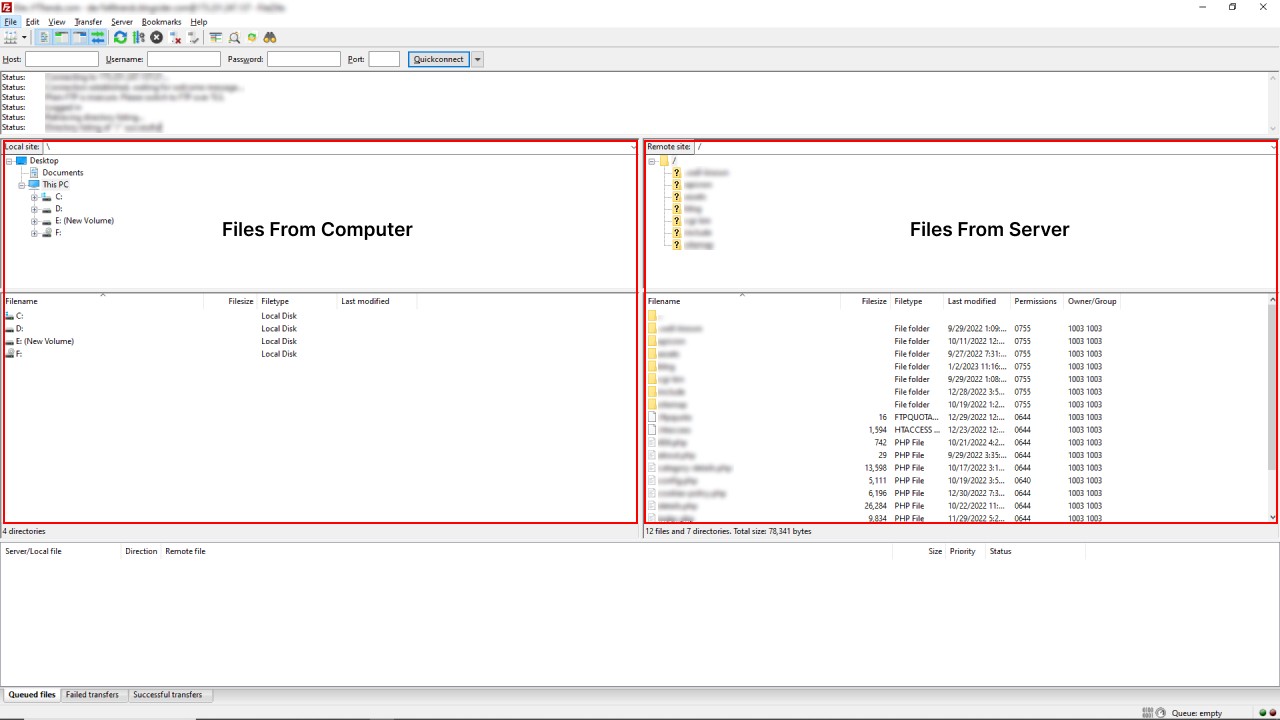
That’s it now your FTP is connected to your website. So on the right side panel, you can see the file structure of your local system. And on the left side panel, you can see the file structure of your server.
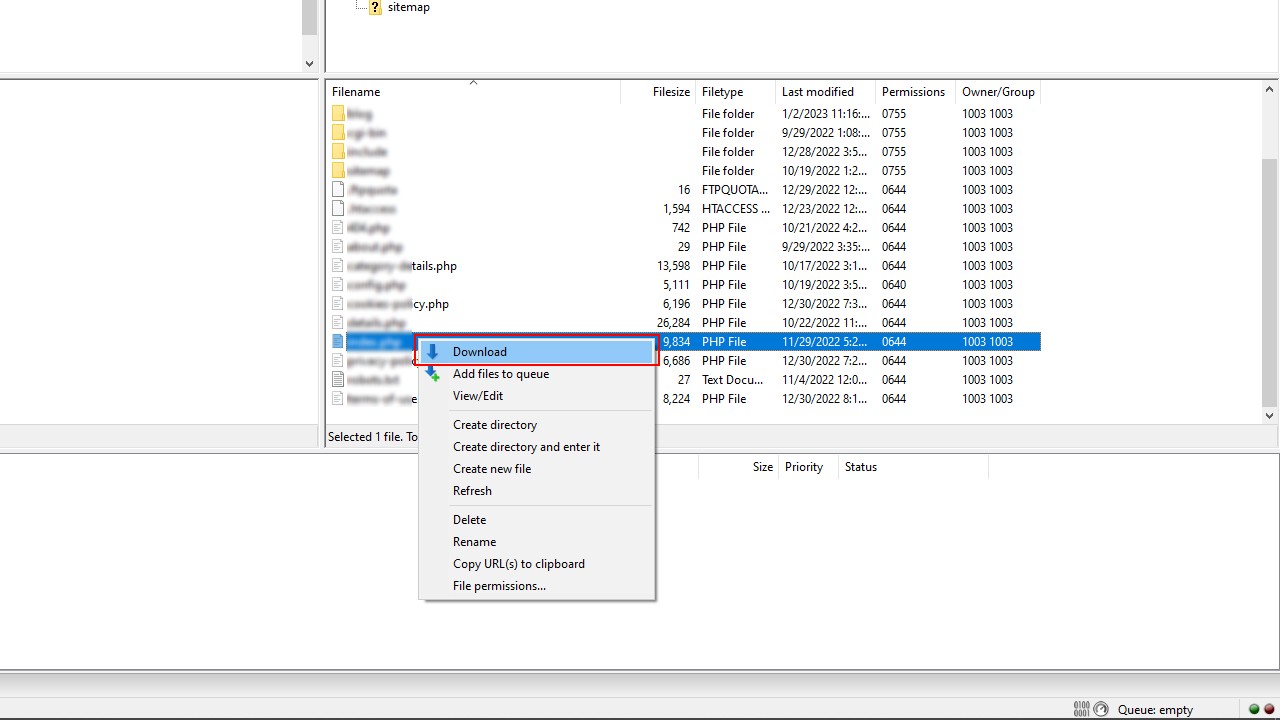
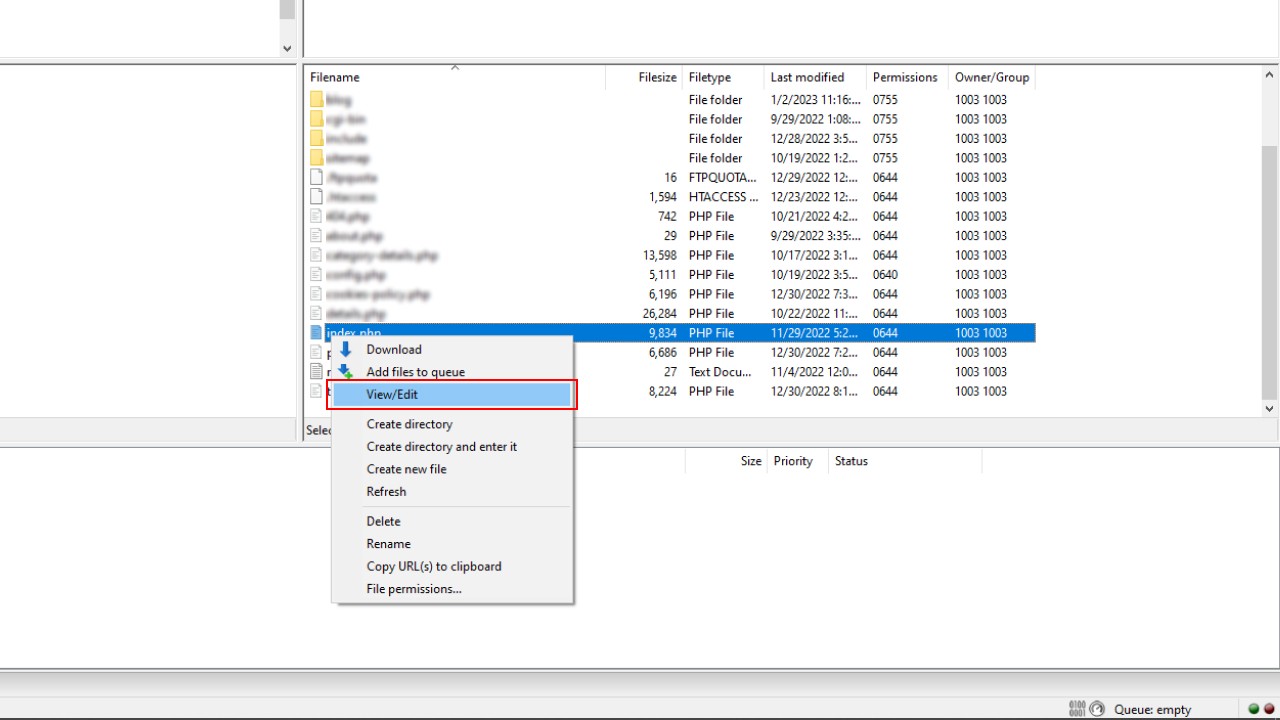
Now let’s learn how to download the file from your server. There is no need for big since you just have to right-click on the file you want to download.
After clicking one sticky menu appears, select the “Download” option from here. Now you can see in the “Transfer queue” your file is being downloaded.
Step 4: Edit your files.
After downloading your file you can open your file for editing. Okay now again right-click on the file, and you got the same sticky menu again.
Here on the sticky menu, you have to select the “View/Edit” option. This option can open your file on your selected file editor application like Notepad++, Visual Studio Code, Sublime Text, etc.
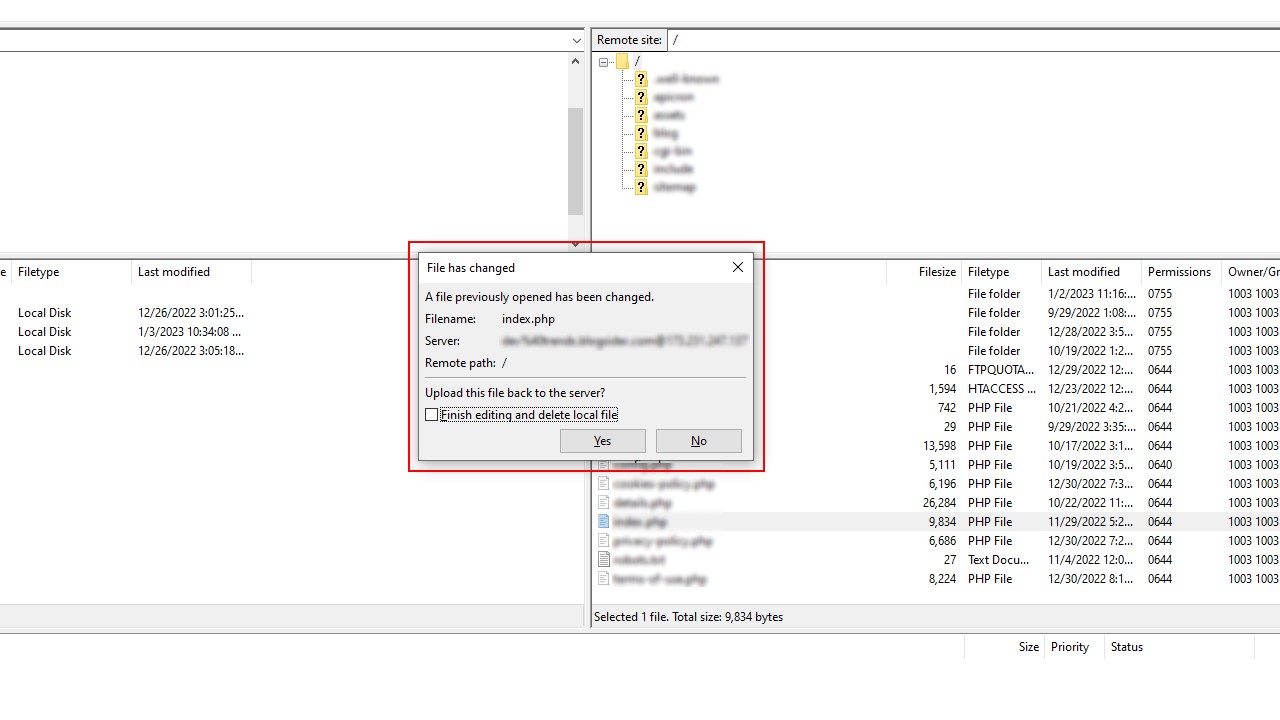
After opening your file, you can start editing from your file editor application. When you save the file from your file editor FileZilla shows you that certain files may have modifications and asks you to save it on the server.
Step 5: Upload your files.
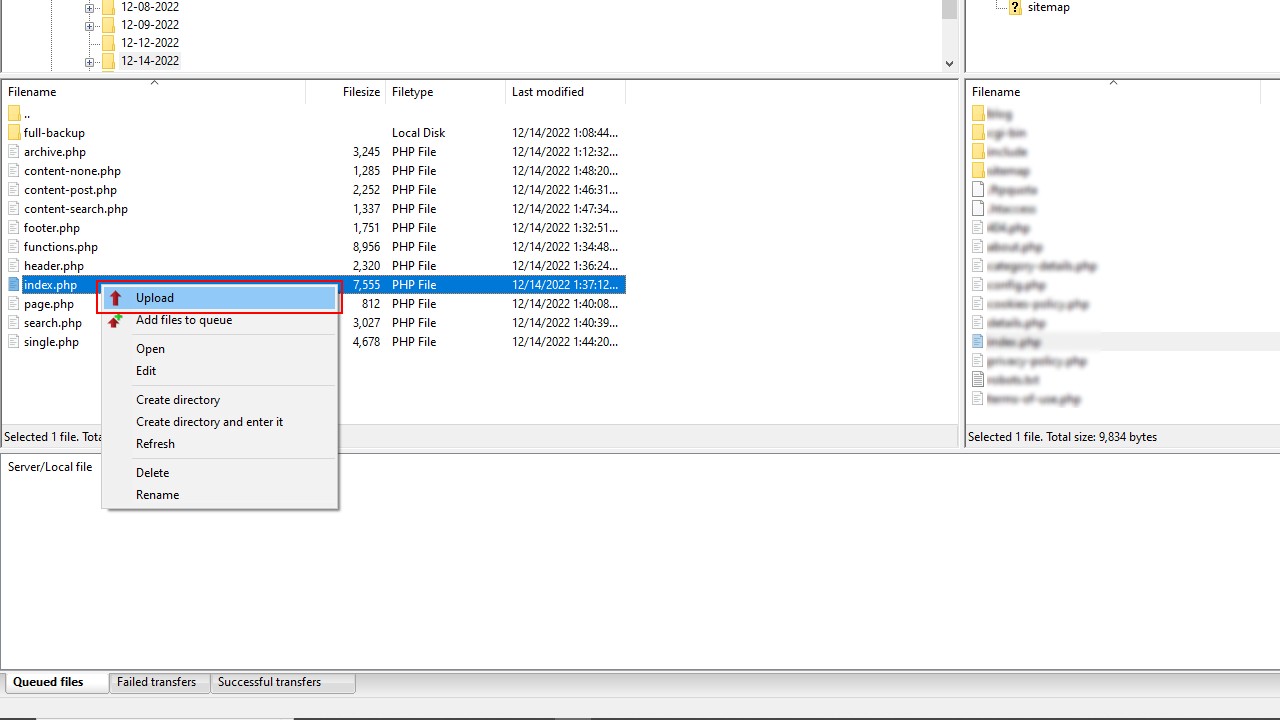
Now if you want to upload a file from your computer to your server. Then simply right-click on the file you want to upload. After clicking on this file a sticky menu appears, here you can file the “Upload” option to upload your file. Look at the transfer queue your file is being uploaded to the server.
So that’s, how you can use the FileZilla server to work with files on the server. If you like this article and want to learn more like this then? you can visit our website Geek Code Lab. We are leading in the development of WordPress and WooCommerce plugins, HTML themes, Graphic Templates, and creative logos. We are also interested in the guest posting if you want to collaborate with us feel free to contact us.
Conclusion
In conclusion, the FileZilla server can be a great tool for speeding up file transfers. By using the right settings and following some basic instructions, you can optimize your file transfers for speed and efficiency. If you’re looking to speed up file transfers with FileZilla Server, there are a few things you can do.
First, make sure your network is configured correctly and that your devices are connected to the same network. Second, use compression to reduce the amount of data transferred. Finally, use FileZilla’s transfer speed optimization features to get the most out of your network connection. So if you’re looking to speed up your workflow, be sure to check out FileZilla!

